Waydoo Support Guide
PART 1. Product Installation
The installation includes setting up the mast & power assembly, connecting battery, and pairing the controller and the board.
Step 1: Setting up the Mast & Power Assembly
The propulsion system consists of a mast, a foil wing and a propeller. Please place the board on the floor and face it down, and then set up the propulsion components one by one – firstly the mast and the propeller, and secondly the foil wing.
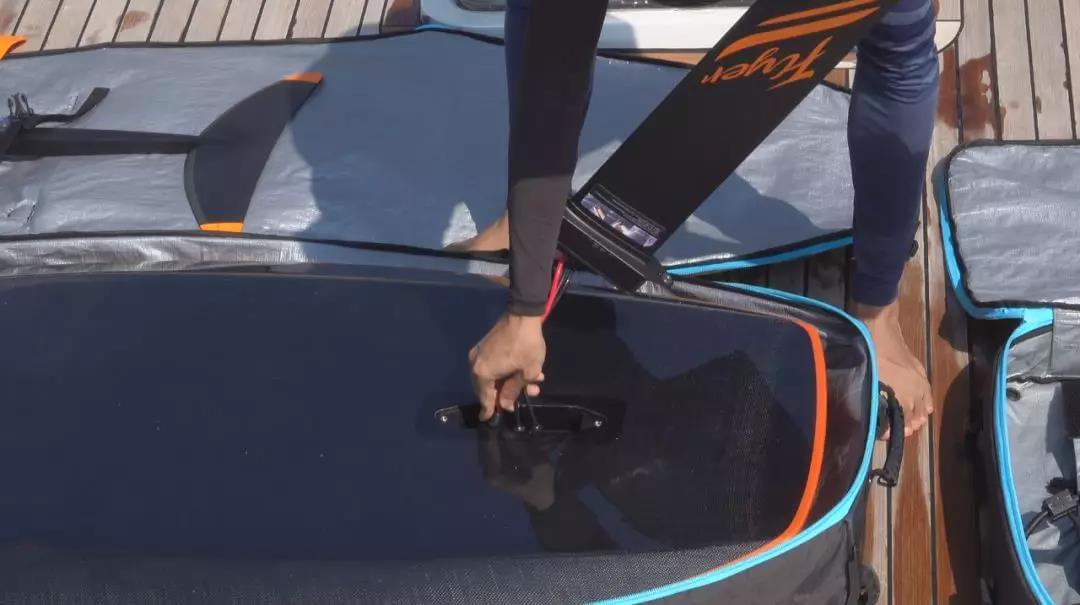
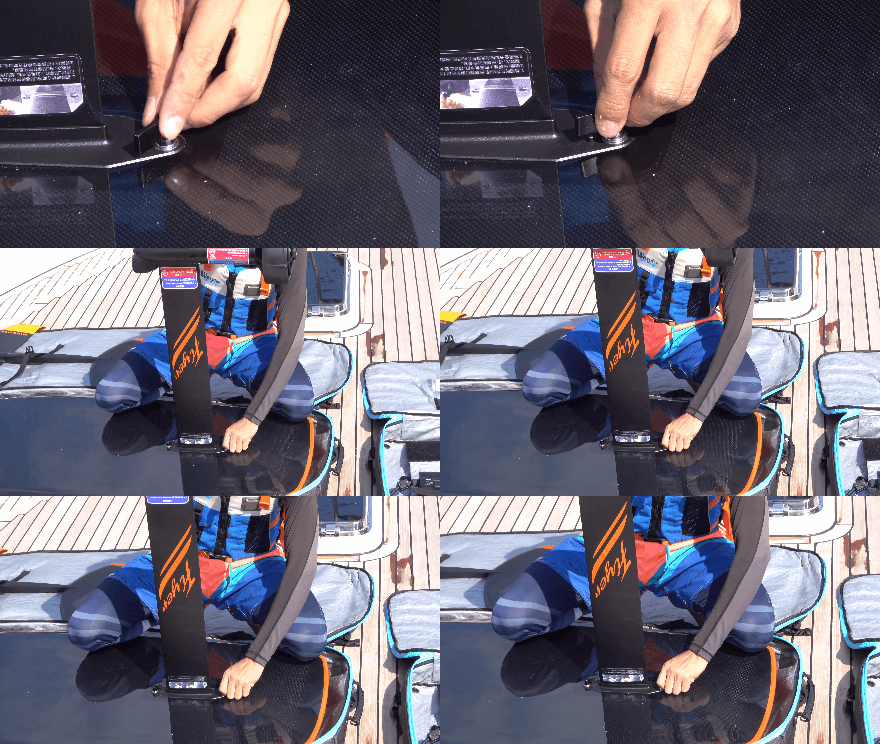
Note: when tightening the screws of the mast on the board, remember to lift the L-bolts to bypass the two nearby blocks, and continue to screw tight. Make sure the mast is screwed tightly by shaking the mast to check if there is any part loose.
Step 2: Connecting Battery
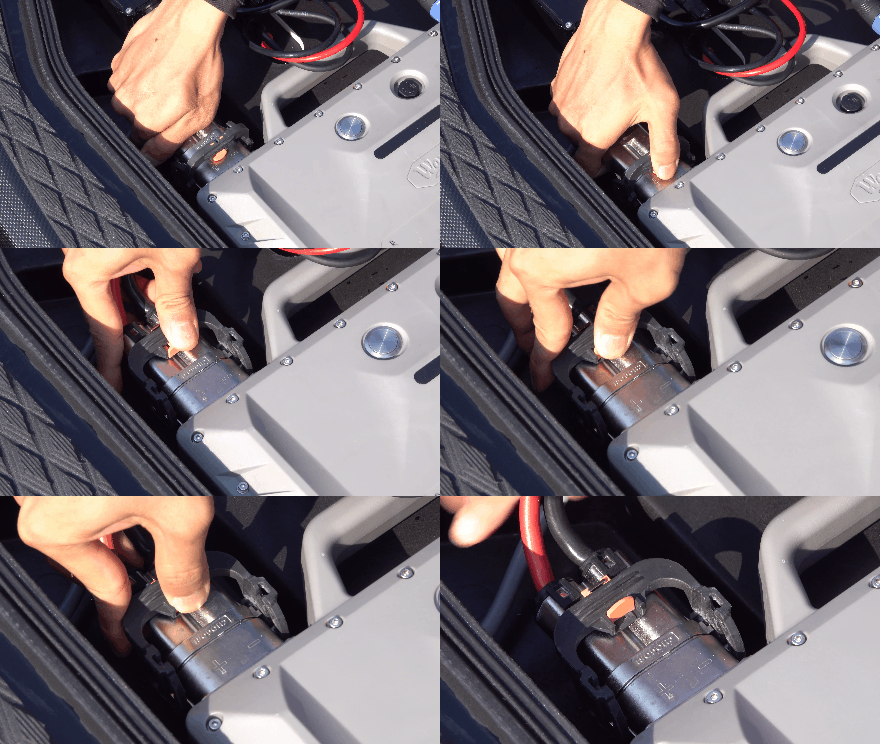
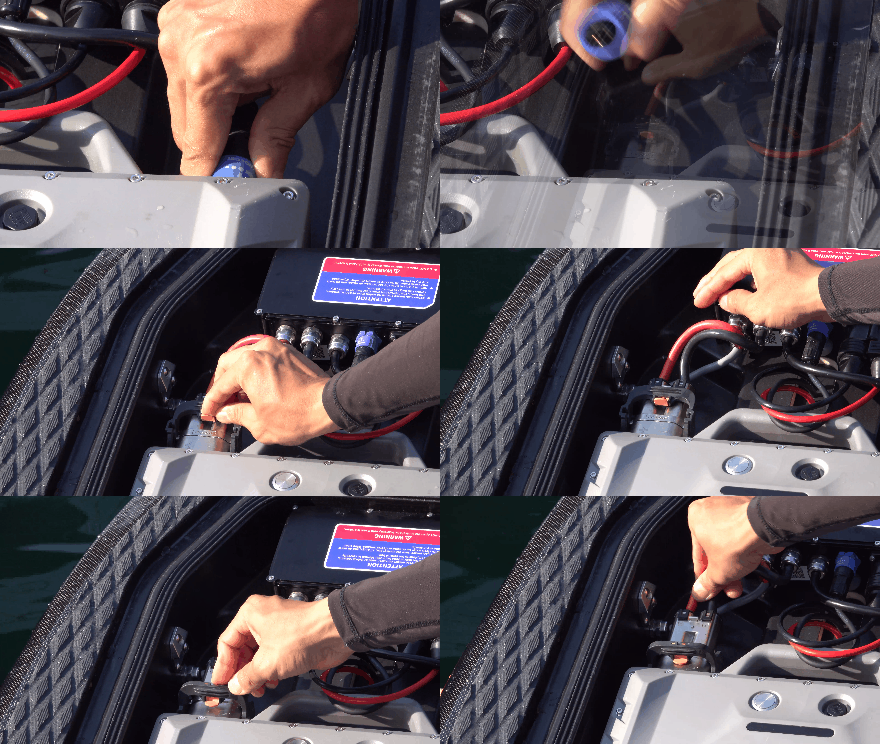
After having the mast & power assembly installed, make sure all electric wires are inserted in the battery hatch. Put the battery inside the hatch, connect the wires to the corresponding ports, and finally tamp down the yellow buckle.
Step 3: Pairing the Controller and the Board
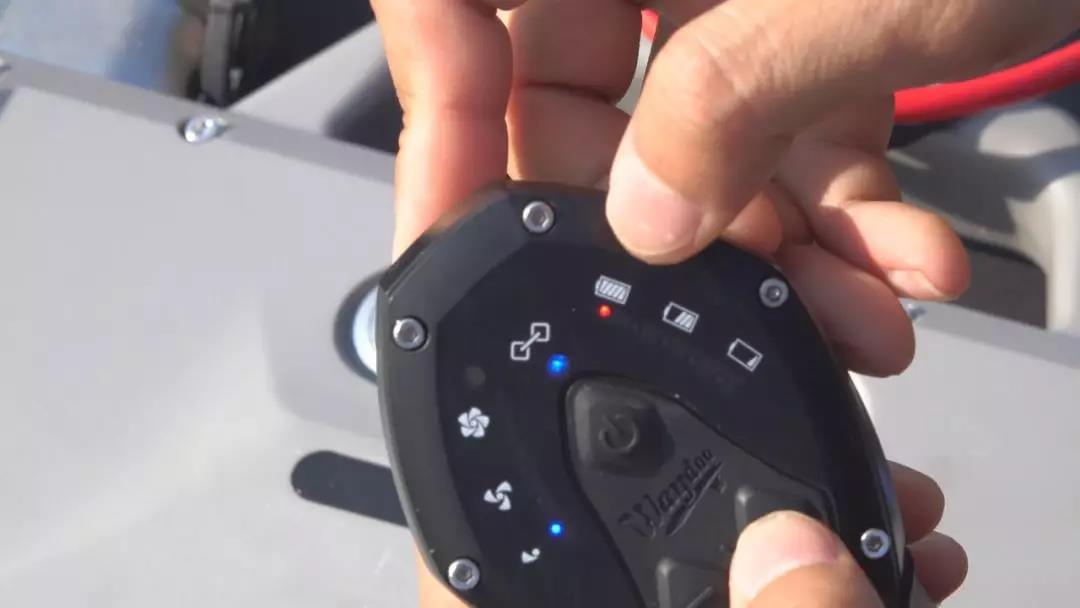
Power on the battery by pressing the button on the surface. Turn on the controller by short pressing once and long pressing the power button. The controller shall be synced automatically. The upper right LED light turning red indicates successful connection.
PART 2. Getting Ready for Flying
To get ready for the new adventure, there are 4 different experience levels you might practice: on-board practice, gliding practice, advanced surfing practice and diving practice.
Step 1: Getting Familiar with the Board
Unlike traditional hydrofoiling or surfing, you don’t need to spend much time learning. The only key to master the product is to focus on your body balance. Use the controller to ride the board and adjust speed, and lean your body side to side to make turns or change direction.
Step 2: On-board Practice
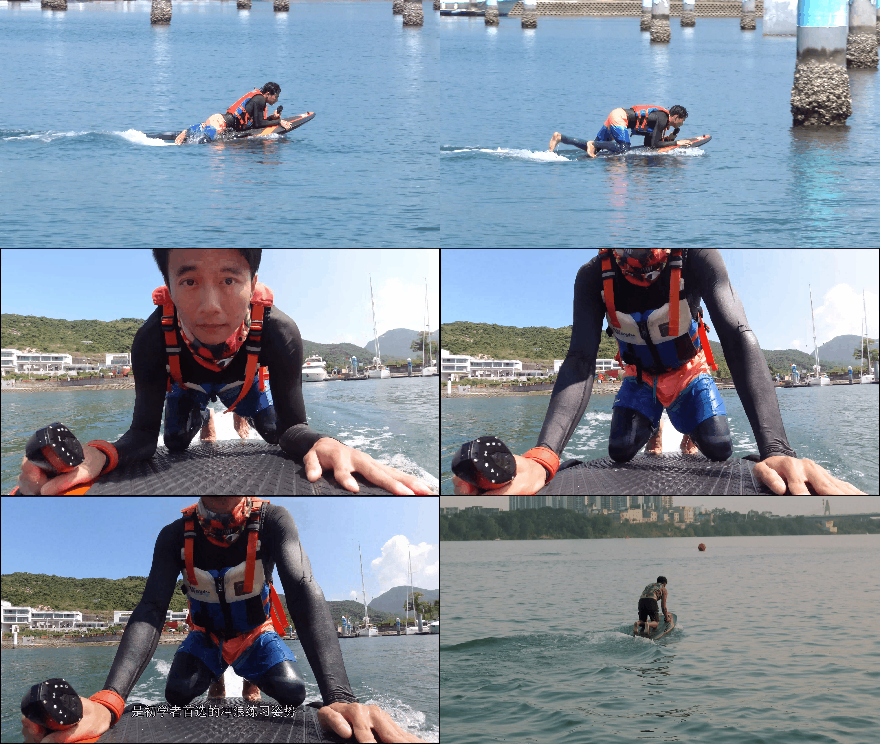
When first trying the board, you can lay on the board to start. Make sure to distribute your weight evenly.
Step 3:Slow-gliding Practice
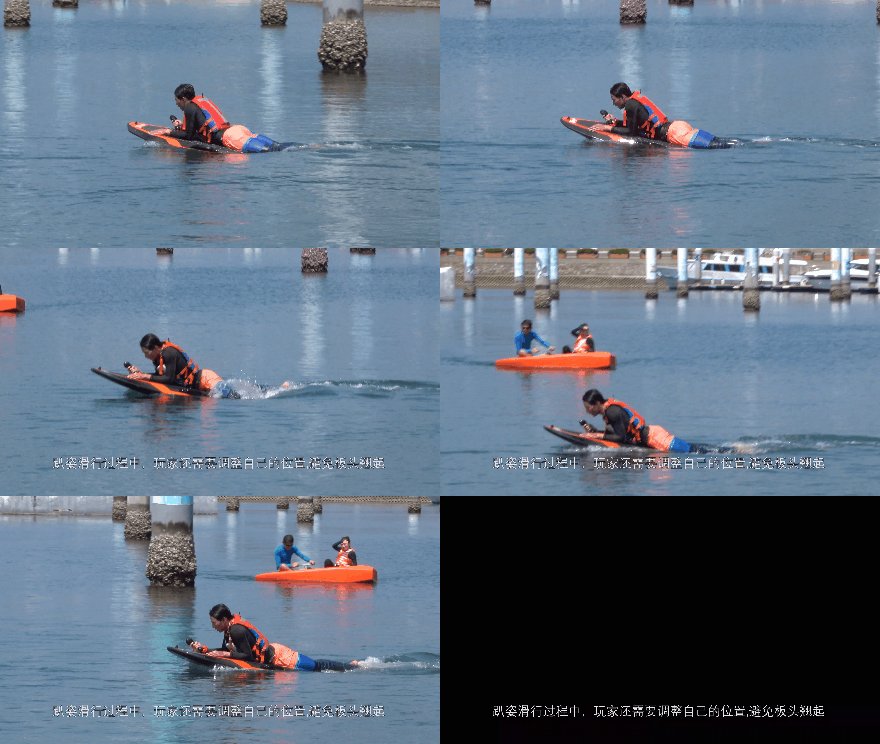
Beginners can try lay, kneel on the board or whatever gesture you feel comfortable. Slowly speed up and try to make a steady gliding practice. Lower down your body can help avoid falling into the water easily.
Step 4: Advanced Practice – to Create Flying Experience
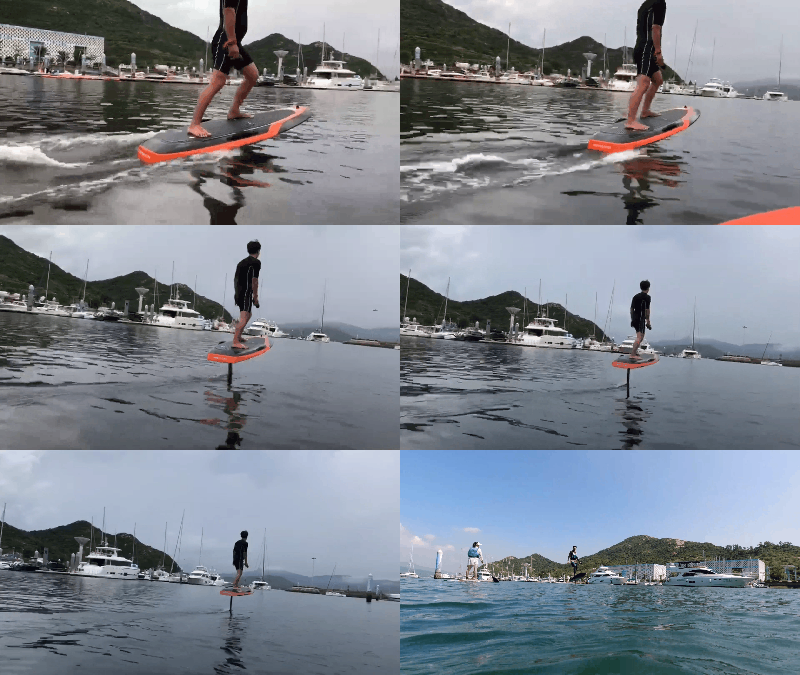
Try standing up and adjusting speed to create unique fly-above-water experience.
Be Careful and Keep Safe
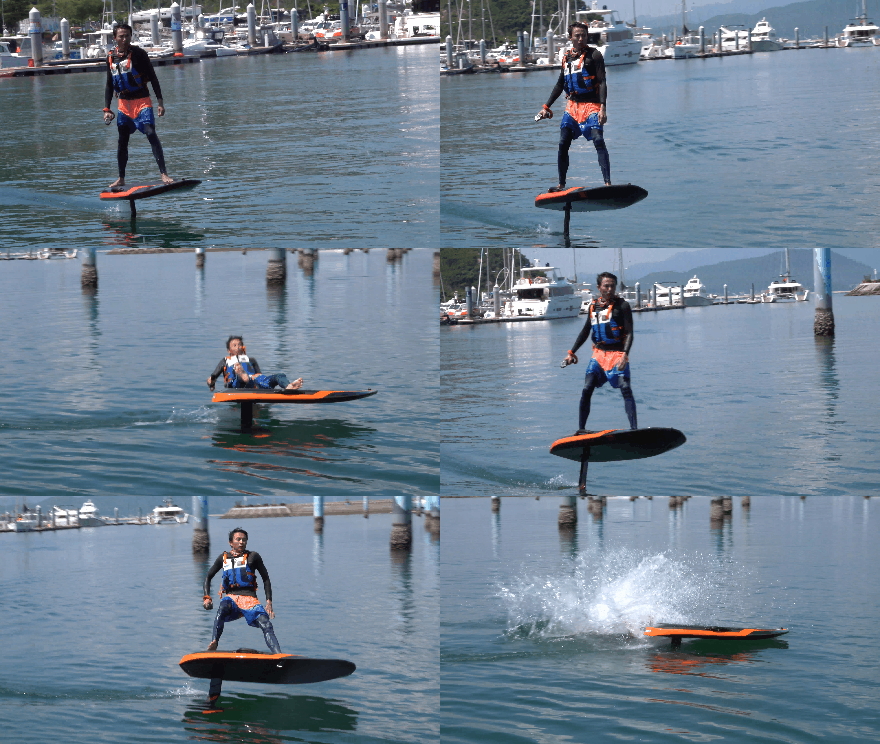
For those who are new to water sports, life jacket is highly recommended to be worn during the whole practice. When you are about to lose balance, try to fall on the same side of the board that tends to flip to, to avoid being hit by the board.
PART 3. Disassembling and Maintaining
Careful disassembly and maintenance can help keep the product in a good condition.
Step 1: Disassemble the Battery and the Mast & Power Assembly
Unplug all the wires and take the battery out. Unscrew the L-bolts to disassemble the mast.
Step 2: Clean the Board
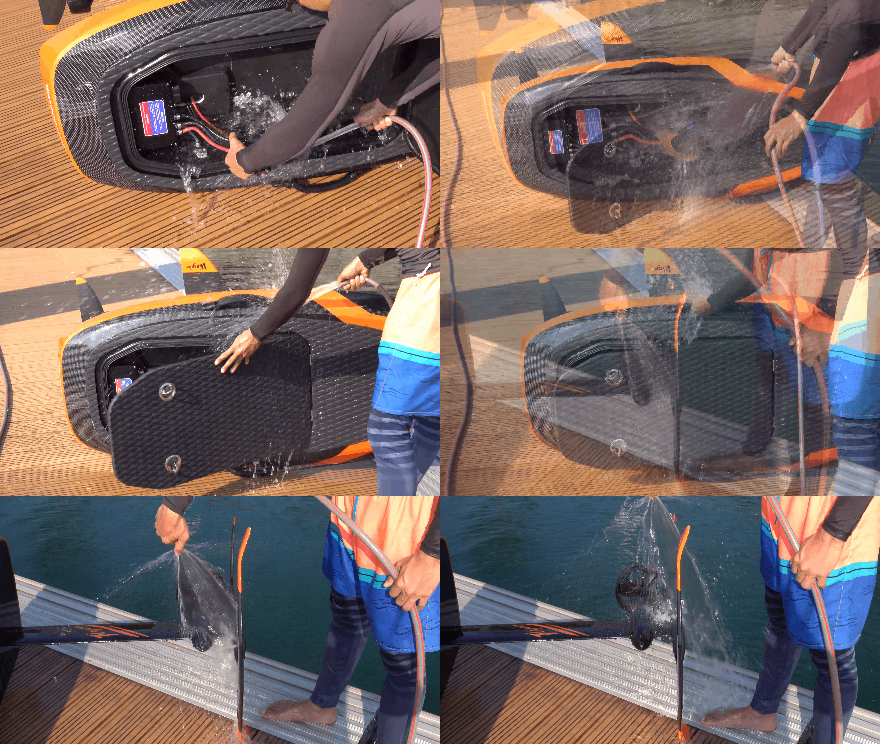
Rinse the battery, the mast and power assembly, the foil wing and the board including the battery hatch and ports with fresh water. This is very important to help keep the product in a good condition.
PART 4. Trouble Shooting
To pair the board and the controller manually
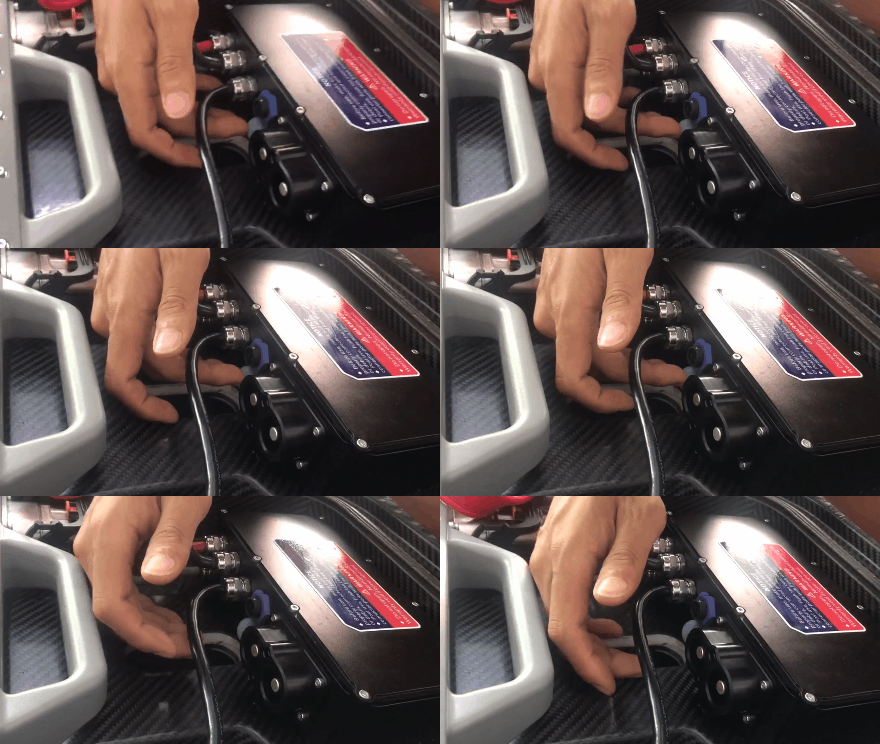
Step 1: Unsync the board manually by long pressing the grey button on the side of the control box till hearing the “beep” sound.
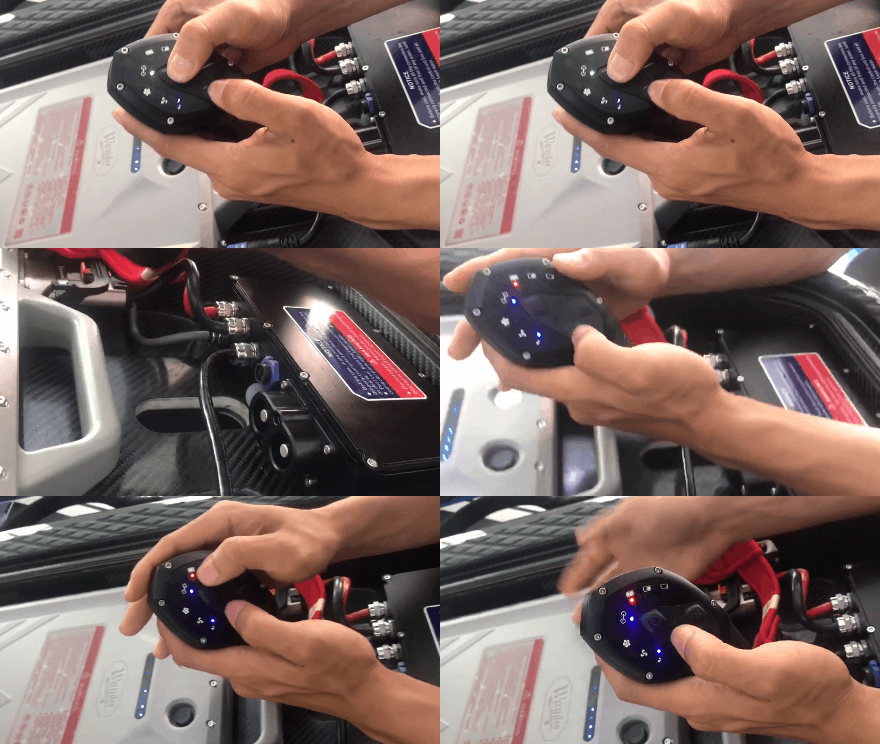
Step 2: Power on the controller first, and long press the power button and the speed “-” button of the controller at the same time. If the LED light in the middle turns from green to blue flashing, the controller is searching for a new pairing signal.
Step 3: Wait 1-2 seconds till the controller is synced to the board. Once the upper right LED light turns red, the pairing is complete.
Remote
Setting Speed Limit
This video will take you through the steps to limit the speed on your Waydoo remote.
Manual Remote Pairing
Manually pairing your Waydoo remote. Watch video
Battery
Magnet Fix
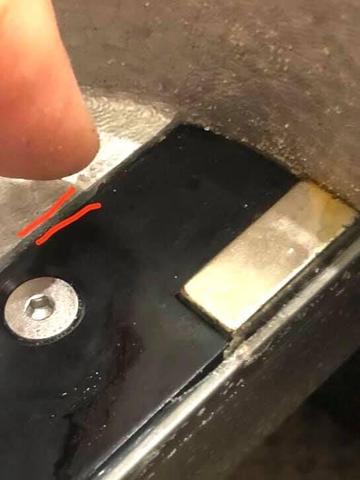
There is a small magnet located under where the battery is seated. This magnet activates the on/off switch inside the battery case when the battery is placed. On a small number of boards the aluminum fitting was not flush with the foam creating a gap. This results in intermittent power loss while using the board.
To fix this problem
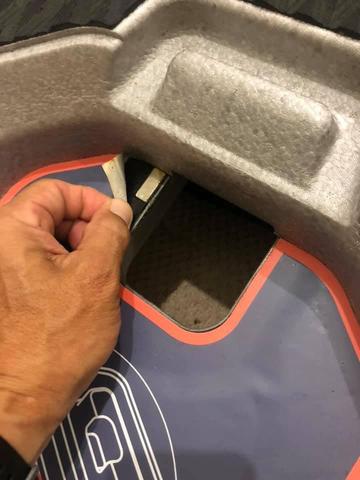
- Peel back the top left portion of the sticker in the battery compartment
- Pry up the magnet
- Place a shim under the magnet
- Re-adhere the sticker
My Board is taking on water
Though EPP foam boards will take on a small amount of water, there should not be an excess of water absorbed during a session. If you can hear water sloshing around inside of your board, and the weight/ balance point is being drastically affected, your board may be defective. This potential issue is caused by a defect in the manufacturing process. The process has been changed to reduce the likelihood of this defect moving forward.
My remote has stopped working
Make sure that your remote is properly charged. If the remote will not charge, and/or there is water inside of the remote, please contact your dealer for a replacement.
My board is running without remote connection
Waydoo is currently investigating this issue, and believes that it may be a software related. Please use the following android app to run a diagnostic on your board https://we.tl/t-hUqWs4YzoG . Once the diagnostic has been performed, please send a screenshot of the data page to support@waydoousa.com. DO NOT USE YOUR BOARD AGAIN UNTIL THE ISSUE IS RESOLVED
Fuselage has broken without impact (no crash, drop, etc.)
Some of the early productions may have been effected by a bad batch of alloy. As a result, some customers have experienced broken fuselages under normal usage. These breakages are covered under your waydoo warranty. The design has been improved to reduce the likely hood of this defect moving forward.
Board turning off randomly (turns back on when pressing power button)
The magnet in the board may not me making a solid connection with the battery See magnet video
Red battery fault light
Check if the temperature of the battery is too high. If the temperature is too high, stop using it and wait for the battery to cool down before continuing to use. Check whether the battery level is too low. If the battery is too low, charge immediately. If the problem is still not solved, contact after-sales service in time.
Battery cannot be charged
First, check whether the fault indicator of the battery is on. If it is, contact the after-sales service to repair or replace the battery, Next, check whether the charger indicator is flashing red. If the charger is in good condition, check whether the AC plug of the charger and the integrated battery port are properly connected. Tighten if they are loose. If the connection is normal, turn the charger over. Make sure the rocker switch of the electrical appliance is in the ON position and then the battery should be able to charge normally.
Motor making abnormal noise during use
Immediately release the trigger of the remote control to stop the motor, turn off the remote control, lay on the board, and paddle back to land using your hands. Take out the battery and check whether there is any foreign matter in the propeller. If there is foreign matter, remove the propeller protective cover and the propeller for cleaning. Before inspecting the propeller, make sure that the battery is disconnected and remove the battery.
Motor not turning during use
Immediately release the trigger of the remote control to stop the motor, turn off the remote control, and lay on the board and paddle back to land using your hands. Check whether the status indicator of the remote control shows normal connection status. Next, check whether the battery level is normal, and then check whether the powertrain and the board are loose. If it is loose, tighten it in time. If the problem is not solved after attempting the above steps, remove the battery and check whether sea water has seeped into the metal joints or if there is any corrosion. If the above situation has occurred, rinse the plug with fresh water and dry it with a rust remover to remove the rust on the metal joints. Finally, wash and dry the plug
Shaking or vibrating while riding
Immediately release the trigger of the remote control to stop the motor, turn off the remote control, lay on the board, and paddle back to land using your hands. Remove the battery and check whether the mounting bolts of the power assembly are loose. If loose, tighten them in time.
The remote control connection appears intermittent during use
Immediately release the trigger of the remote control to stop the motor, turn off the remote control, lay on the board, and paddle back to land using your hands. Turn on the remote control and check whether the Bluetooth icon is flashing. If it is flashing, restart the battery and pair again using Bluetooth. If the problem is still not resolved, contact after-sales service in time.
Remote fault codes
“Err.1” = Angle sensor initialization failed. “Err. 2” Spiflash initialization failed. “Err. 3” = Angle sensor and spiflash initialization failed. “Err. 4” = GPS failed. “Err. 7” = Angle sensor initialization, spiflash initialization, and GPS failed.
